If your RC car engine is brand new it will need to be broken-in / run-in to avoid premature engine wear or damage. See this guide: Break in procedure of nitro engine
Starting a Nitro RC Car
If you are new to the world of model nitro RC cars then you can be forgiven if you don’t know how to start one. The process is pretty straightforward, providing the Engine is in good working order.
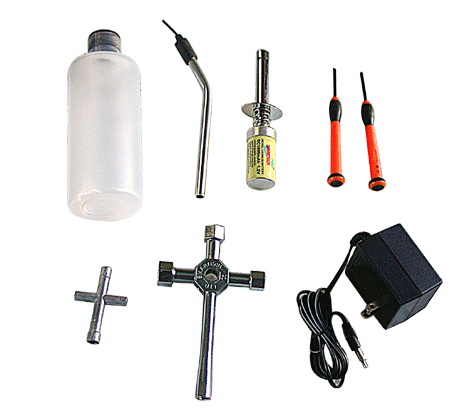
Below is the contents of a typical Nitro Engine Starter Kit; it has everything you’ll need to get your car running, with the exception of Nitro/Glow fuel.

You’ll need these essential items to get your RC car started…
- A glow igniter ( or power panel with glow connector )
- Fuel – (check the manual for the correct fuel to use)
- Fuel pump or fuel bottle to fill up the fuel tank (or just use a funnel to prevent fuel from spilling everywhere)
- Batteries for the transmitter and receiver
- If applicable, make sure any electric starter you plan to use is fully charged with enough power to start the car.
Check-list before you begin
Before you begin, make sure you check the following points:
- Check batteries are installed and when switched on the throttle and steering servos are operating as they should. You can perform a range check by walking away from the car while operating the controls. See if you still have full control from the distance you will be running the car from (with the car secured so it doesn’t shoot off).
- Fill the tank with fuel using a funnel or filler bottle to avoid any spills (nitro is very flammable). Use fresh fuel. Old fuel may make starting difficult or impossible if it has absorbed water or gone bad.
- Check your glow igniter or glow connector is charged or has power and is working (To test it, use a new or spare glow plug that you know is good – the glow plug coil element should glow orange when inserted into the glow igniter).
Ready to start the engine
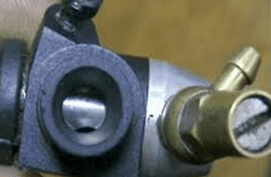
Switch on your radio set and car power switch and set the throttle trim to about a quarter, or just enough so that air can get into the carburettor (or carb). The carburettor should have a foam air filter fitted over it so you probably won’t be able to see the opening, but if you can easily take the filter off you will see the carb opening and closing when you operate the throttle. The photo below shows roughly where to set it to.

Priming the engine with fuel
The fuel tube that goes from the fuel tank to the carburettor will most likely be filled with air (or old fuel). By forcing fuel through from the fuel tank we will push the air out so that the fuel gets to the carburettor.
If the fuel tubes are filled with very old fuel, it is probably best to temporarily disconnect the fuel tube and clear this out rather than forcing it into the carburettor.

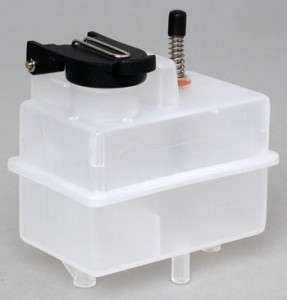
Some nitro RC cars have a fuel tank with a push button (see photo above) on the top that you can press several times to get the fuel up to the carburettor. If you don’t have a button, you can achieve the same effect by holding your finger on the end of the exhaust and turning the engine over (without the glow starter fitted) several times until you see the fuel start moving through the pipe and up to the carb.
Once you see the fuel reach the carb, fit the glow starter onto the glow plug, set the throttle on your controller to idle and then turn the engine over using whatever method you have available (Pullstart, roto / electric start / drill start / battery box starter, etc.).
After a few seconds, hopefully you will hear the engine burst into life. If it doesn’t start right away, check the mixture settings according to the manual and also check that the glow plug is good. Also, don’t forget to check the glow starter has plenty of power by fixing a known good glow plug into the end and seeing that it glows.
- Notes on pullstart: If using a pull-start, do not pull the chord too far out; they are quite easily broken if you’re not careful.
- Notes on using electric drill with roto-start type adapter: Set the drill to a low torque setting; I have seen roto-start systems wrecked by high powered drills.
